Thursday, November 27, 2008

Windows Live Writer Plugin Development

Windows Live Writer is a cute small free blog publishing desktop application. If you are tired of the browser based tools to post your blogs, you must try Writer where you can create rich content posts offline and then publish to your blog hosting server when you are online.
lwplugin0
Windows Live Writer can be easily installed by double clicking the downloaded WLinstaller.exe file. To The initial wizard during the startup will help to configure to an existing blog or to create a new blog. There are no other additional configurations or settings involved.
Plugins helps in extending the capabilities of Writer to insert, edit, and publish new types of content. It is very easy to develop a plugin if you are a .NET developer. For the plugin development no separate SDK is required as all the APIs comes with the installation and will be available in the installation folder typically at C:\Program Files\Windows Live\Writer.
lwplugin4
lwplugin1
lwplugin2
lwplugin3
There are two types of content source plugins a) Simple (inserts custom html) and b) Smart (inserts custom html with editing options).
Content created by both simple and smart content sources can originate from an Insert dialog box, a URL, or Live Clipboard data. Each content source plugin can support creating content from one or all of these contexts.
In this post, we will see how we can develop a Simple Content Source Plugin through Insert Dialog Box. You can use Visual Studio 2008 or 2005 or 2003.
  • Launch Visual Studio and start a new Class Library Project in C#.
  • Add a reference to the WindowsLive.Writer.Api assembly (located in the directory C:\Program Files\Windows Live\Writer).
  • Create a new class derived from ContentSource base class from this API.
  • Apply the WriterPluginAttribute to the new class that will define the plugin properties. (Use a new GUID to identify this plugin. If an image is specified in the attribute, add this image as an embedded resource to the project. The publisher URL and description will appear in the Plugins options in Writer).
  • Apply the InsertableContentSourceAttribute to the new class that will define the plugin content. This will appear as the menu name under Insert menu.
  • Override the CreateContent method and code the required functionality there.
  • Add a Post Build event to the project to copy plugin dll to the Writer plugins directory after it is built (XCOPY /D /Y /R "$(TargetPath)" "C:\Program Files\Windows Live\Writer\Plugins\").
  • Build the project and then run Windows Live Writer to test and debug. New plugin will appear under Insert menu.
The complete code snippet for a hello world plugin is given below:
using System.Windows.Forms;
using WindowsLive.Writer.Api;

namespace LiveWriterPlugin
{
[WriterPluginAttribute
("8CFEFA0C-6366-419f-9590-20A6590728DC",
"My Sample Plugin",
ImagePath = "mypluginimage.png",
PublisherUrl = "http://ctlabs.blogspot.com",
Description = "A sample plugin that can insert hellow world in your blog posts")]

[InsertableContentSourceAttribute("My Sample Plugin Content")]
public class MyPlugin: ContentSource
{
public override DialogResult CreateContent(IWin32Window dialogOwner, ref string newContent)
{
DialogResult result = MessageBox.Show("Do you want to insert this sample content?","My Plugin",MessageBoxButtons.OKCancel);

if (result == DialogResult.OK)
{
newContent = "Hello World from Plugin";
}

return result;
}
}
}

That's it. Look at the above images to see this plugin in action. Happy plugin development!

Thursday, November 06, 2008

Innovation Days Again At Kochi

It was just 5 months back we had an Innovation Days event at Kochi from Microsoft. Seeing the great response from the IT enthusiasts at Kochi, Microsoft has come back today with yet another session packed event. This time the location was at Taj Residency at Marine Drive.  Kochi techies showed their interest by turning up in large numbers, making it a house-full event.

The day started with a keynote address from Vikram Rajkondawar, Architect Advisor at Microsoft (India). He spoke in detail about the Software + Services mantra Microsoft is transitioning to, and clarified myths around Cloud computing and briefly explained Windows Azure and other latest technologies. There was a Live Mesh demo that showed connected devices (two laptops and a mobile) synchronizing files between them.

The session on SQL Server performance issues by Praveen was in-depth as he discussed internals of SQL Server and how a query is parsed, algebrized and optimized before execution. He did mention that from SQL Server 2005 onwards it doesn’t matter if you are using stored procedures or inline SQL queries as both gives similar results on a performance point of view.

Nahas Mohammed did a short session on Internet Explorer 8 and demonstrated its new features like Accelerators and Web Slices.

Chandrashekar’s session on .NET debugging tools helped in understanding some of those rarely used, but highly useful debugging tools like Fusion Log Viewer (fuslogvw.exe), NGen, SoS.dll, ILDAsm, ILAsm, and Managed Debugging Assistance (MDA).

Praveen concluded the event with a session on Rich Internet Applications (RIA) and spoke about ASP.NET MVC, AJAX, jQuery integration and Silverlight.

Between the technical tracks, there was a short session on Innovate On partnership program that Microsoft launched last time. A guy from TIE (The IndUs Entrepreneurs) spoke about their institution and inspired us to think on entrepreneurship.

There were lots of goodies (T-Shirts, books) given out besides a great lunch. I enjoyed the overall event and could meet many friends/ex-colleagues as well as some new people from the Kochi developer community. As I had registered for the Innovate On program last time, I received my first kit containing a T-Shirt, Technology Specialist certificates, and CDs containing technical resources.

Thursday, October 30, 2008

Multi-Touch Windows 7 Application

See this video of Multi-Touch Windows 7 Application developed by IdentityMine.


Read more about it here.

Latest from Microsoft

New technology/product release spree that Microsoft seems to be in lately has come to its high with the Professional Developers Conference (PDC) 2008 concluding today at Los Angeles, USA.

It's been not very long since Microsoft has released .NET 3.0/3.5 with completely new technologies like WPF, Silverlight, WCF, and so on. Recently they released the next versions of them (Silverlight 2, and .NET 3.5 SP1) and PDC saw the announcement of Silverlight 2 Tool Kit and WPF Tool Kit.

Other Products/Technologies that were previewed at PDC include Windows 7, Windows Azure, and Visual Studio 2010 / .NET 4.0.

Windows 7 (formerly codenamed Blackcomb and Vienna) is the next version of Microsoft Windows and the successor to Windows Vista. I tried out the developer preview version of Windows 7 Ultimate (Build 6801) and found it not much different from Windows Vista in look and feel. But under the hood, it includes a number of new features, such as advancements in touch, speech, and handwriting recognition, support for virtual hard disks, improved performance on multi-core processors, improved boot performance, and kernel improvements. Read more here.

Windows Azure is Microsoft's operating system for the cloud. The Azure Services Platform combines cloud-based developer capabilities with storage, computational and networking infrastructure services, all hosted on Microsoft's servers. Read more here.

The next version of Visual Studio is 2010 with .NET Framework 4.0. Read more here.

I wonder why Microsoft is still continuing the calendar year naming for the versions of Visual Studio while they discontinued it for Windows. Anyway, as developers in Microsoft technologies, there is no end to our continuous learning and re-learning cycles.

Wednesday, September 17, 2008

Microsoft Live Mesh

Live Mesh is a new software product from Microsoft that was released to public few months back. It helps in synchronizing files and folders that are used across different computers and devices.


 When you work on a project or document on more than one computer (say one at home and one at work), you often land into this issue of keeping the files synchronized. Live Mesh solves this issue by connecting all the devices together, so that you don’t have to manually copy and keep the latest files by yourself.

To use Live Mesh go to http://www.mesh.com and sign in using a Windows Live ID (hotmail email address is good enough). After that, add a device (say your work computer) to the Mesh by installing the Live Mesh client software. Now you can choose any folder to be a Live Mesh Folder and the files in that folder will be automatically synchronized with other devices you have added to your Mesh.


Live Mesh also has a Live Desktop as part of the connected devices that you can access from any other computer (say internet café) through a browser. This Live Desktop shows all Mesh Folders and files and it is even possible to remotely connect to a computer.

Another useful feature is the ability to share a Mesh Folder with a remote user. I played with this feature today and found the updates I make to a file are visible to the shared user within few seconds.

Microsoft is releasing development APIs and SDKs as well, for developers who can make use of the Live Mesh platform to create applications that are accessible across multiple devices. Live Mesh is now in Tech Preview state (not even Beta) and Mobile and Mac support are also on its way.

Thursday, September 11, 2008

Desklighter Update: Beta 1.1 with 64 bit support

Thanks to one user (aquaseal) who reported that Desklights are not displaying the Silverlight content on 64 bit systems. We have fixed this issue and a new version of Desklighter (Beta 1.1) is now available for download from Blendables Labs.

Another update we released with this version is the icon feature for Desklights. Earlier, Desklights were showing the default windows executable icon and now it is changed to a Desklight exe icon.

Update: http://ctlabs.blogspot.com/2009/09/desklighter-update-beta-2-with-more.html

Wednesday, September 03, 2008

Google Chrome - Browser from Google

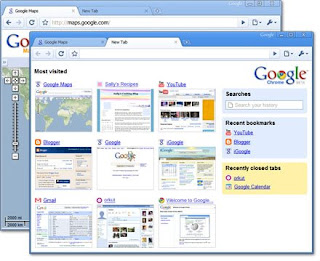
Today, Google released their new product, Google Chrome, an interesting internet browser. As one would expect from Google, it is much faster, compact and less cluttered.


Like most other Google products, Chrome is also released as Beta version, but I would assume that it will be much stabler than a Release Candidate product from Microsoft. :)


As Google have built this browser from scratch keeping in mind today's Rich Internet Application scenarios, there are several architectural differences from other popular browsers. For example, each tab opened in the browser runs as a separate process, allowing one to close a hung tab without affecting other open tabs.


The memory used by each site and plug-ins can be seen through its task manager... so we know who is eating up more resources, and can kill them instantly. Read more about such technical details as a comic book here.


Google Chrome has a mix of useful features from both Internet Explorer 8 and Fire Fox 3. One such feature is incognito tab, where you can browse a site without leaving any trace or history.

After installing Google Chrome today, I immediately fell in love with that. In fact, I have changed my default browser from IE to Chrome. I may still continue to use Fire Fox, as it has got many useful extensions and plug-ins, until they are available in Chrome.


Many sites didn't work as expected in Chrome as they didn't understand this new browser. Windows Live Mail complained, but let me get in with the older version. Even Blogger complained "Your browser's cookie functionality is disabled", but on the second attempt it was fine. The Silverlight installation page displayed "This Web browser or operating system may not be compatible with Silverlight.". But I was able to view a Silverlight content without any issues.

Monday, September 01, 2008

Desklighter – carry the light along

Today is a great day for me. At IdentityMine, I’ve been working on a software tool named as ‘Desklighter’ since some time back and now it is released to public as a free beta version through our product website’s labs section at http://blendables.com/labs/Desklighter/Default.aspx.


Desklighter is a windows utility that can convert a Silverlight application into a standalone desktop application. The output from Desklighter is a single executable file that can display the Silverlight content on windows desktops without requiring a hosting server or a browser. Desklighter enables users to carry a Silverlight application off the web to wherever they need it.

Download Desklighter from here and try converting your Silverlight XAP files into windows exes.

The idea of taking the Silverlight application off the web into a portable single file executable opens up a whole new playing field. Now you will be able to carry your favorite Silverlight games from the web in a USB Flash drive to your friends who are not connected to internet. You can now share your exciting ideas materialized in Silverlight without having to worry about the hosting infrastructure. Your flashy Silverlight demo can now be taken to your customer for showcasing during a presentation. You can distribute your stylish e-brochure done in Silverlight in CDs to whomsoever you want. The possibilities are endless.

A Desklight (the EXE created using Desklighter) need to have the Silverlight plug-in (currently Silverlight 2 Beta 2) installed to run on windows desktops. Below is a screen shot of a sample Desklight. You can download more samples from http://sites.google.com/site/silverlightoffline.


Information about a Desklight including the Desklighter version used to create it can be found when executed from a command line with 'info' as the argument.


Another available command line argument is ‘debug’, which displays the Desklight’s server information while the Silverlight content is getting served. Use this if you see some issues while running a Desklight to know what is happening behind the screens.


Read the complete technology story behind Desklighter here.


The name ‘Desklighter’ was chosen to represent Desktop + Silverlight. My colleague Hariprashanth was the one who created all the graphics work for Desklighter. The logo is made up of four ‘D’s (representing Desklighter) with the windows logo colors (representing desktop).  Hari did an excellent work in giving it a stylish look.

I would like to thank all my colleagues here at IdentiyMine for extending their support and providing valuable feedback during the development of Desklighter. The wish list for the next version of Desklighter is growing,  thanks to the innovative ideas from them.

Please let us know what you think about this tool, and what you would like to see in its future versions.

Update - New Version Released: http://ctlabs.blogspot.com/2009/09/desklighter-update-beta-2-with-more.html

Wednesday, August 27, 2008

Google Sites

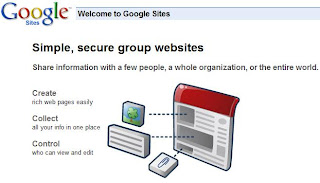
Few months back (February 2008) Google released a new web product known as Google Sites. Unlike Google Page Creator, it has more features to build and host complete websites for free.


The announcement on Google Page Creator home page says that they are getting rid of this service to focus on the new Sites service. The complete announcement is here:

We are no longer accepting new sign-ups for Page Creator because we have shifted our focus to developing Google Sites, which offers many of the capabilities of Page Creator along with new features like site-level navigation, site-level headers, control over who can see and edit your site, and rich embeddings like calendars, videos, and Google docs.

If you are currently a Page Creator user, you can continue to use Page Creator and your pages will automatically be transitioned to Google Sites later this year. We are committed to making this transition as smooth and easy as possible, and we will post more details as we get closer to the transition time. You can also manually move your web pages from Page Creator to Google Sites or other service providers at any time.

I played around with Sites and found it very easy to host a new site. All it took was few clicks. Here is the site I created: http://sites.google.com/site/sameerct


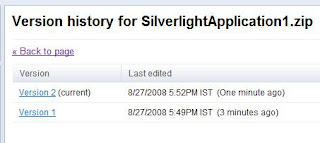
It has a killer feature to host files. While creating a new page, you can choose its type as File Cabinet and you get unlimited version controlled file storage for free.

Here is a sample file I hosted: http://sites.google.com/site/sameerct/sourcecode/SilverlightApplication1.zip

Really cool… Thank you, Google!

Friday, August 22, 2008

SQL Server 2008

Microsoft SQL Server 2008 (code named as Katmai) is now ready and the trial version is now available for download. See details here.

This major release after SQL Server 2005 (Code named as Yukon) has got lots of new features. Processing of delimited strings, C like math syntax, Intellisense in the SQL Server Management Studio (SSMS) are some of them. Read more here or here.

SQL Server 2008 Express Edition (Free version) is now available for download, but it's free Management Studio is not yet ready.


SQL Server never had a logo before. With this new release, now SQL Server has also got a logo. Read about it here.

Friday, May 30, 2008

Microsoft Innovation Days at Kochi

I attended the Microsoft Innovation Days event at Le Meridien Hotel, Kochi today. Innovation Days are day-long free events filled with technical and business sessions, during which one can learn about the Microsoft technology roadmap and are introduced to upcoming technologies. Microsoft also presents Partner Programs and benefits for ISV partners.

This year the event series in India started on 16-May-2008 at Chennai and is concluding at Pune on 02-Jun-2008. Besides Cochin, Ahmedabad is the only other city to host this event. One source from Microsoft indicated that the big cities like Bangalore, Mumbai and Delhi are getting 'abused' by events and the number of no-shows after signing up is increasing. That made them to choose Tier-II cities in India for such events where they are getting a very good response.


The day here started with a session by Nahas Mohammed on 'Building Rich Internet Applications Using Silverlight 2.0'. At the end of it, my colleague Jim Mangaly did a great presentation showcasing 'Lithium', a virtual vehicle gallery and showroom application developed in Silverlight. He explained how various awesome technologies in Silverlight were taken to full advantage for the development of this application. The 200 plus technology enthusiasts in town were quiet impressed with the presentation. Since our company IdentityMine is mostly focusing on US market, we are not so well known here. But the participation in events like this are slowly changing the scene.

The next session 'Building high performance .NET applications' by Harish Ranganathan focused on tips and tricks to make .NET applications perform better. He also did a demo of 'ASP.NET Dynamic Data' which is part of '.NET Framework 3.5 Service Pack 1 Beta'. It was scary to see him build a web site to manage all the data operations (add/edit/delete) for all the tables in a database just by pointing to a LINQ to SQL data context. The wizard created website was complete with proper navigation and validation.


After a heavy and delicious lunch, there were two more interesting sessions named 'LINQ: Working with data naturally!' and 'Getting the Best from SQL Box: Performance Tuning SQL Server'.

Microsoft also announced their partner program called Innovate On for Kochi. They distributed a lot of goodies for the early birds and for the question askers.

Wednesday, May 07, 2008

WPF Color Pad

Ever wanted to see the list of named colors available in WPF's System.Windows.Media.Colors? And fancied using it's hexa code to get the colors like 'Tomato' in your web page?

Here is a simple WPF Application called ColorPad that lists out all the named colors. Click on a color to see its hexa code value. Remember to remove the first two letters/digits that represents the transparency (Alpha value) if you are using this color in html pages.


The application can be downloaded from here.

The XAML Source Code:

<Window x:Class="ColorPad.Window1" Icon="ColorPad.ico"
xmlns="http://schemas.microsoft.com/winfx/2006/xaml/presentation"
xmlns:x="http://schemas.microsoft.com/winfx/2006/xaml"
Title="ColorPad" Height="500" Width="300" WindowStyle="SingleBorderWindow" ResizeMode="NoResize">
<Window.Resources>
<DataTemplate x:Key="tempGrid">
<Rectangle Width="60" Height="20" Fill="{Binding Name}" Stroke="#FF000000"/>
</DataTemplate>
</Window.Resources>

<Grid x:Name="LayoutRoot" ShowGridLines="True">
<StackPanel Orientation="Vertical">
<TextBlock x:Name="uxTitle" Text="ColorPad Version 1.0.0" Width="210" TextAlignment="Center" />
<ListView Height="400" Width="210" Name="uxColorGrid">
<ListView.View>
<GridView x:Name="uxColorGridView">
<GridViewColumn Header="Color Name" DisplayMemberBinding="{Binding Path=Name}" />
<GridViewColumn CellTemplate="{DynamicResource tempGrid}" Header="Color" />
</GridView>
</ListView.View>
</ListView>
<TextBlock x:Name="uxFooter" Visibility="Collapsed" Width="200" Background="{Binding RelativeSource={RelativeSource Self}, Path=Text}" />
<TextBox x:Name="uxColorCode" Width="210" TextAlignment="Center" />
</StackPanel>
</Grid>
</Window>


And the Code Behind in C#:

using System.Reflection;
using System.Windows;
using System.Windows.Controls;
using System.Windows.Media;
using System.Collections.Generic;

namespace ColorPad
{
/// <summary>
/// Interaction logic for Window1.xaml
/// </summary>
public partial class Window1 : Window
{
public Window1()
{
InitializeComponent();

uxColorGrid.ItemsSource = typeof(Colors).GetProperties();
uxColorGrid.SelectionChanged += new SelectionChangedEventHandler(uxColorGrid_SelectionChanged);
}

void uxColorGrid_SelectionChanged(object sender, SelectionChangedEventArgs e)
{
PropertyInfo c = uxColorGrid.SelectedItem as PropertyInfo;
uxFooter.Text = c.Name;

SolidColorBrush scb = uxFooter.Background as SolidColorBrush;
uxColorCode.Text = scb.Color.ToString();
uxTitle.Foreground = uxFooter.Background;
}
}
}

Monday, May 05, 2008

ASP.NET 3.5

My last two major projects were in ASP.NET 2.0. That was just few months back. Now I am getting swamped in the .NET 3.5 world with WPF, Silverlight and LINQ and was bit worried when I had to consider ASP.NET as an option for a new project. By all chance, few months is longer than enough for Microsoft to flood us with new technologies and I was almost sure the new ASP.NET 3.5 will yet again look like an odd world for me.

But that was not the case. As with the .NET framework, the ASP.NET 3.5 is a set of additive features on top of ASP.NET 2.0. Most of the things I have learned in .NET 3.5 like the cool new C# features (LINQ, Query Expressions, Lambda Expressions, Type Inferencing (var), Class and Collection Initializers, Anonymous Types, Extension Methods) are useful in the web development world too. Moreover the new Visual Studio 2008 features (improved web page designer, css editing, javascript intellisense and debug support) are also much helpful for web developer.

Besides that there are very few ASP.NET specific new features. That includes ListView Control, DataPager control, and the integrated ASP.NET AJAX support.

ListView control is a beautiful data web control that can be bound to multiple records (like a grid) but still allows flexible layout. The DataPager only works with ListView Control and provides a paging user interface - next, previous, first, last buttons, for example.

AJAX support was earlier available in ASP.NET 2.0 as a separate download. Now it is part of ASP.NET 3.5. But if we want more AJAX controls, we still need to download the AJAX Control Tool Kit. You can unzip the contents to your computer (Somewhere like C:\Program Files\AjaxControlToolKit) and add them to Visual Studio. Make sure that the AjaxControlToolkit.dll is available in the Binaries folder. If not, you can either build the solution or copy it from the SampleWebSite's bin folder. By right clicking on the Toolbox in Visual Studio 2008, you can Add a new Tab and then Choose Items to browse for AjaxControlToolkit.dll to add all the AJAX controls into the tool box.

I did a sample AJAX website in few minutes. As usual start a new 'ASP.NET Web Application' project and make sure the target version of .NET Framework is 3.5. First we need to add the 'ScriptManager' and 'UpdatePanel' controls from AJAX Extensions tab in Toolbox and then we can add the controls to this panel. Try adding a Text Box, a Button, and a Label. On the designer, double click on the button to get the click event handler in the code behind. Change the label text to display something. (Label1.Text = "Hello " + TextBox1.Text;).


On the designer, an adorner appears on the supported controls and it can be used to add AJAX extenders. I tried adding a Confirmation Button Extender for the button and all I had to write was the ConfirmationText for this extender.

<asp:Button ID="Button1" runat="server" onclick="Button1_Click" Text="Button" />
<cc1:ConfirmButtonExtender ID="Button1_ConfirmButtonExtender" runat="server"
ConfirmText="Are you sure?" Enabled="True" TargetControlID="Button1">
</cc1:ConfirmButtonExtender>

On running the application, a confirmation message box will appear while clicking this button, and the click event will be fired only after user confirmation. All this code will run at client side and the beauty is that I didn't write a single line of javascript.

Try adding PasswordStrength and DropShadowText extenders for the text box and have fun exploring more.

Monday, March 17, 2008

LINQ to SQL

Language-Integrated Query (LINQ) is a set of features in .NET Framework 3.5 (Visual Studio 2008) that extends powerful query capabilities to the language syntax of C# and Visual Basic. LINQ introduces standard, easily-learned patterns for querying and updating data, and the technology can be extended to support potentially any kind of data store. Visual Studio 2008 includes LINQ provider assemblies that enable the use of LINQ with .NET Framework collections, SQL Server databases, ADO.NET Datasets, and XML documents.

In Visual Studio you can write LINQ queries in Visual Basic or C# with SQL Server databases, XML documents, ADO.NET Datasets, and any collection of objects that supports IEnumerable or the generic IEnumerable<(Of <(T>)>) interface. LINQ support for the ADO.NET Entity Framework is also planned, and LINQ providers are being written by third parties for many Web services and other database implementations.
You can use LINQ queries in new projects, or alongside non-LINQ queries in existing projects. The only requirement is that the project target version 3.5 of the .NET Framework.

There are different variants of LINQ as listed below:
LINQ to Objects
LINQ to XML
LINQ to ADO.NET (Dataset)
LINQ to SQL
LINQ to SQL

LINQ to SQL is a component of .NET Framework version 3.5 that provides a run-time infrastructure for managing relational data as objects.

In LINQ to SQL, the data model of a relational database is mapped to an object model expressed in the programming language of the developer. When the application runs, LINQ to SQL translates into SQL the language-integrated queries in the object model and sends them to the database for execution. When the database returns the results, LINQ to SQL translates them back to objects that you can work with in your own programming language.

See also http://msdn2.microsoft.com/hi-in/library/bb425822(en-us).aspx

The DataContext
The DataContext is the main conduit by which you retrieve objects from the database and resubmit changes. You use it in the same way that you would use an ADO.NET Connection. In fact, the DataContext is initialized with a connection or connection string you supply. The purpose of the DataContext is to translate your requests for objects into SQL queries made against the database and then assemble objects out of the results. The DataContext enables language-integrated query by implementing the same operator pattern as the standard query operators such as Where and Select.

Implementing LINQ to SQL
LINQ to SQL is best implemented in a project using the built-in Object Relational Designer (O/R Designer) in Visual Studio 2008. O/R Designer auto generates the DataContext class and entity classes for all the tables in a specified database.

To launch it,
Visual Studio 2008 > Projects > Add New Item > Visual C# (Category) > LINQ to SQL Classes (Template)
(Eg Name: Northwind)

This will open a blank O/R Designer. Now open Server explorer and add a new data connection to the required database. Drag and drop the required tables to the O/R Designer and it will automatically generate all needed classes.

The DataContext class will be named as NorthwindDataContext and this can be used to do operations against the database.

Selecting Data


//Create the DataContext object
NorthwindDataContext db = new NorthwindDataContext();

//Write the Select Query
var prods = from p in db.Products
select p;

//Use the output in various ways
foreach (Product prod in prods)
{
MessageBox.Show(prod.ProductName);
}

//assigning as data source to a grid view
gvMain.DataSource = prod;


Updating Data


//Getting one row from the Products table
Product prod = db.Products.Single(p => p.ProductName == "First Prod");

//Updating two of its columns
prod.UnitPrice = 25;
prod.UnitsInStock = 50;

//Submitting the changes to database
db.SubmitChanges();


Inserting Data


//Creating a new category
Category cat = new Category();
cat.CategoryName = "New Test Category";
cat.Description = "This is a new type of category";

//Creating two new products
Product p1 = new Product();
p1.ProductName = "First Prod";

Product p2 = new Product();
p2.ProductName = "Second Prod";

//Add the products to new category
cat.Products.Add(p1);
cat.Products.Add(p2);

//Add category to database and save changes
db.Categories.InsertOnSubmit(cat);
db.SubmitChanges();


Deleting Data


//Get the required data to delete
var toyProds = from p in db.Products
where p.ProductName.Contains("toy")
select p;

//Delete it from database
db.Products.DeleteAllOnSubmit(toyProds);
db.SubmitChanges();


So start using LINQ and refer the 101 samples at http://msdn2.microsoft.com/en-us/vcsharp/aa336746.aspx to help you with any syntax issues.

Thursday, March 13, 2008

SharePoint - Web Part Deployment

This post is applicable to Microsoft Office SharePoint Server (MOSS) 2007. See my previous posts on Installing SharePoint, Creating Web Site, and Developing Web Parts.

This walk-through provides the steps for deploying a basic custom SharePoint Web Part by either copying the assembly dll to the Server (if not strong named) or by deploying to GAC (if strong named) and configuring it through SharePoint administration site.

1. Copy the web part dll file to the bin directory on the server’s web location if the assembly is not strong named.
a. Log into the computer where SharePoint Server is installed.
b. Copy the web part dll (HelloWebPart.dll) to the SharePoint web’s bin directory. Usually this location will be at C:\Inetpub\wwwroot\wss\VirtualDirectories\80\bin.
c. If the SharePoint was installed on a different port (say 37729), this location will be at C:\Inetpub\wwwroot\wss\VirtualDirectories\37729\bin.
d. This location can be easily found from the IIS Manager (Locate the appropriate portal, for which u want to deploy the web part, identified with the port number. Right click and have Properties. Under the Home Directory Tab, note the path in Local path text box).
e. If the bin folder doesn’t exist at this location, then you can create one.
2. If the assembly is strong named, deploy it to the GAC. (Note that either Step-1 or Step-2 is required; not both.)
a. Log into the computer where SharePoint Server is installed.
b. Drag and drop the web part dll to the C:\Windows\Assembly folder using windows explorer. This will install the assembly to Global Assemble Cache. After that, right click on the assembly name from here and choose Properties. Copy the Public Key Token value for using in the configuration.
3. Add a Safe Control entry in the web configuration file of SharePoint Server.
a. Open the web.config file from the server’s web location which will be at C:\Inetpub\wwwroot\wss\VirtualDirectories\80\ or at a port number as mentioned above.
b. Add a new entry within the section as below:

<SafeControl Assembly="HelloWebPart" Namespace="HelloWebPart" TypeName="*" Safe="True" />

This indicates that all(*) classes in the HelloWebPart namespace in the HelloWebPart assembly are safe web parts.

If the assembly is strong named, it should have the Public Key Token copied from the previous step.

<SafeControl Assembly="ControlSampleWebPart, Version=1.0.0.0, Culture=neutral, PublicKeyToken=c627d6df943a8393" Namespace="ControlSampleWebPart" TypeName="*" Safe="True" />

c. Save the web.config file and close it.
4. Configure the server to use this new web part.
a. Open the SharePoint Central Administration site from a browser using http://servername or http://servername:port ensuring that the current logged in user has the administrative rights on the portal site.
b. Go to Site Actions > Site Settings (top right menu button).
c. Go to Galleries > Web Parts to open the web part gallery.
d. Click on the New button.
e. The New Web Parts page displays all the web parts marked as safe on the server. Scroll down to the required web part in the list, check the check box on the left and click on the Populate Gallery button at the top of the page. This will result in the Web Part entry creation in the Web Part Gallery list, and hence it can be used from now on from the gallery. Notice that the Web Parts developed in latest .NET Frameworks has .webpart as extension while the older ones has .dwp as extension.
5. Add this web part to a page in a site.
a. Go to Site Actions > Edit Page (top right menu button). This displays the current page in edit mode.
b. Click on the Add a Web Part button on the desired section of the page.
c. Select the required web part (Hello) from the All Web Parts > Miscellaneous section of the web part gallery.
d. Click on the Add button.
e. Click on the Exit Edit Mode link on the top right corner to exit the edit mode of this page.

Wednesday, March 12, 2008

Developing SharePoint Web Part using Visual Studio

Refer my earlier posts on installing Microsoft Office SharePoint Server (MOSS) 2007 and creating website if you need more information.

This walkthrough provides the steps for creating a basic custom SharePoint Web Part using Visual Studio 2008 or 2005. It is a very simple Web Part that displays the logged-in user name with a Hello message.

1. Create a new Visual C# Class Library Project in Visual Studio.
  • Start Visual Studio.
  • On the File menu, point to New, and then click Project.
  • In the New Project dialog box, click Visual C# Project Type, and then select the Class Library template.
  • Type HelloWebPart as the name and specify the location for the project files, and then click OK.
2. Add reference to System.Web..
  • On the Project menu, click Add Reference.
  • On the .NET tab, double-click System.Web.
  • Click OK.
3. Add Namespace Directives.
  • First, rename the class file from Class1.cs to Hello.cs (Confirm by clicking yes).
  • Add the following using directives near the top of your code.
    using System;
    using System.Web;
    using System.Web.UI;
    using System.Web.UI.WebControls;
    using System.Web.UI.WebControls.WebParts;
4. Inherit From the WebPart Class.
  • Derive the Hello class from System.Web.UI.WebControls.WebParts.WebPart class.
    namespace HelloWebPart
    {
    public class Hello: WebPart
    {

    }
    }
5. Override the RenderContents base class method.
  • This method is used to render contents on the web part. Here we are displaying a Hello message to the current user.
    protected override void RenderContents(HtmlTextWriter writer)
    {
    writer.Write("Hello, " + this.Context.User.Identity.Name);
    }
6. Build this project to get the assembly HelloWebPart.dll
If we need to render a control instead of contents, override the CreateChildControls and RenderControl method as shown below:
     protected override void CreateChildControls()
{
//Create a Calendar control and set its properties.
Calendar helloCalendar = new Calendar();
helloCalendar.Enabled = true;
helloCalendar.ShowGridLines = true;
helloCalendar.ShowTitle = true;
helloCalendar.EnableViewState = true;
helloCalendar.SelectedDate = DateTime.Now;

//Add this Calendar to the Web Part.
this.Controls.Add(helloCalendar);
}
public override void RenderControl(HtmlTextWriter writer)
{
this.RenderChildren(writer);
}
In the above example, we are creating a calendar control and setting its properties and then adding it to the web part. The RenderControl method is used to call the RenderChildren method, which causes the children controls to be rendered on the particular HtmlTextWriter passed as a parameter to the method.

If this assembly needs to be strong named (to enable GAC deployment), follow the below steps:
  • Launch the Visual Studio Command Prompt.
  • Type the following command to generate a key pair file:
    sn –k c:\keypair.snk
  • That will generate the key pair file at c:\
  • Refer this file in the web part project’s AssemblyInfo.cs file as below:
    [assembly: AssemblyKeyFile("c:\keypair.snk")]
  • Make sure that the version is also specified here as below:
    [assembly: AssemblyVersion("1.0.0.0")]
    [assembly: AssemblyFileVersion("1.0.0.0")]
  • Build the project to generate a strong named assembly.
If you are using Visual Studio 2008 or higher, you can can skip all these steps and then go to the Signing tab of the project properties, and choose 'Sign the assembly' option.
We will see how to deploy this web part on SharePoint Server in the coming posts.

Tuesday, March 11, 2008

SharePoint - Creating Web Site

A new web site can be created in Microsoft Office SharePoint Server (MOSS) 2007 easily by following below steps:
1. Launch the SharePoint Central Administration site from a browser using http://servername or http://servername:port.
2. Go to Site Actions > Site Settings (top right menu button).
3. Go to Site Administration > Sites and Workspaces.
4. Click on the Create button.
5. Provide a Title, URL Name, and select a Template. (Choose Team Site for a team web site)
6. Choose the Permissions and Navigation Styles. (Leave it at the default values.)
7. Click on the Create button to create the site.

Web Parts are the building blocks of a SharePoint site. You can add a web part to an existing page in the site by editing the page. Whatever web parts installed and configured on the server will be available to use in any pages.
1. Go to Site Actions > Edit Page (top right menu button). This displays the current page in edit mode.
2. To delete an existing web part, click on the Edit > Delete menu of that web part.
3. To add a new web part, click on the Add a Web Part button on the desired section of the page. All the available web parts will be populated in a popup window. Choose the required one and click the Add button.
4. Click on the Exit Edit Mode link on the top right corner to exit the edit mode of this page.

You can add more pages to the site following below steps:
1. Go to Site Actions > Create (top right menu button).
2. Click on Web Pages > Basic Page link.
3. Provide a Name, and it will be saved under the default Document Library called Shared Documents.
4. Click on the Create button. This will create a blank page where you can add contents.
More such items can be added to a site to make it more interactive. For example, the Wiki Page Library creates a set of wiki pages where the end user can edit the contents of the pages.

Monday, March 10, 2008

MOSS (Microsoft Office SharePoint Server) 2007

Today I got some time to see MOSS in action. Microsoft Office SharePoint Server 2007 is a new server program that is part of the 2007 Microsoft Office system. We can use Office SharePoint Server 2007 to facilitate collaboration, provide content management features, implement business processes, etc.

Installation:
You need Windows Server 2003 to get this installed. Choose the Basic option to install a stand alone version. Advanced option is to install this in a server farm. You get to choose specific SQL Server in this case. There are no other things to remember during installation. Installation automatically creates a new instance of SQL Server (\OfficeServers) and around seven databases.

Configuration:
After the installation, configuration window pops up. Everything is configured automatically including all the services required for MOSS.

Administration:
The server can be administered from the admin web site through the shortcut at:
Start > Programs > Microsoft Office Server > SharePoint 3.0 Central Administration
or directly accessing it from a browser using http://servername:port

Reset the Internet Explorer Security to Low (Tools > Internet Options > Security > Custom Level > Reset to Medium-low) to enable all the administrative tasks in MOSS.

Adding other Administrators:
In the admin portal, we can add more admins to the site using following link:
Site Actions > Site Settings > Site collection administrators

The users are picked from the active directory of the server's domain.

Creating a web site with multiple web parts (items like calendar, discussion forum, etc) is also as easy as clicking few links from the admin portal.

Saturday, March 08, 2008

Silverlight – Lighting up the web!

“Microsoft Silverlight is a cross-browser, cross-platform, and cross-device plug-in for delivering the next generation of .NET based media experiences and rich interactive applications for the Web.

By using Expression Studio and Visual Studio, designers and developers can collaborate more effectively using the skills they have today to light up the Web of tomorrow.”

That’s the quote from Microsoft on www.silverlight.net about this new technology that takes the richness and power of WPF to the web world.

When I first learnt about Silverlight, the available version was 1.0 and was using Javascript as its coding language. After knowing that .NET support is on its way and getting chance to try my hands on the pre-release builds, I waited for version 2.0 to come. The beta version of Silverlight 2.0 was released last week.

Silverlight is a browser plug-in that allows the browser to use some of the user’s local computational horsepower. The plug-in has no external dependencies. For example, Mac users do not need Windows Media Player to play back WMV content. We are already familiar with plug-in technologies like Java Applets and Flash applications. But Silverlight brings all the power of WPF in animation, graphics, video, etc. And with version 2.0, the CLR (Common Language Runtime) is going cross platform and developers can use their favorite .NET language to write code that runs on the client from within a browser.

Wednesday, February 27, 2008

VS 2008 and Visio AddIn Deployment Issues

I stumbled across an issue when I was working on a Visio AddIn Project in Microsoft Visual Studio 2008. It is very easy to create an AddIn for Microsoft Office Applications like Visio using the project templates available in Visual Studio (File > New > Project > Visual C# > Office > Visio 2007 Add-in). It becomes little tougher when we need to deploy this AddIn especially if it has multiple projects and data files. I went for ClickOnce deployment as it was easier as right clicking on the project and choosing 'Publish'. My AddIn had to read a data file while loading.

While installing this application on a client machine using ClickOnce, it never ask you for an installation path and it copies the files into two different folders with random names! Mine looked like this:

C:\Users\Administrator\AppData\Local\Apps\2.0\CA5NQ9ZB.N44\E6TLT686.69V\visi..vsto_11aeaa34550a68ee_0001.0000_14f3717c0aa57ea0
C:\Users\Administrator\AppData\Local\Apps\2.0\CA5NQ9ZB.N44\E6TLT686.69V\visi...dll_11aeaa34550a68ee_0001.0000_none_47ef10bd354219e1

And the frustrating thing is that all dlls gets copied to the first folder and the data files to the other. So my application never found the file it needed to load and I had no idea on how to solve this as the folder names kept changing randomly with every new deployment. I think these are some caching locations and the application dlls were not available anywhere else. Do anybody know what is happening here and what is the solution?

Finally I made my Deployment work by making the data file as an embedded resource (Properties > Build Action) and reading the data as below:

Stream resourceStream = System.Reflection.Assembly.GetExecutingAssembly().GetManifestResourceStream(MyNamespace.MyClass.MyFile.xml");

TextReader tr = new StreamReader(resourceStream);

Thursday, February 21, 2008

WayFormat: Source Code Color Formatter

There are lots of tools and ways to color format source code snippets so that they appear on blog posts and sites as they do in Visual Studio or other source editing tools. One of them is available at http://www.manoli.net/csharpformat/ which nicely formats the code to colorful HTML. But I was looking for a small desktop application that we can take along to use offline. Thankfully Manoli has provided the source code on the website for anyone to make use of it.


So, I made a small utility and named it WayFormat (Yeah… you guessed it right, the ‘Way’ comes from ‘Coolwayfarer’!). This standalone windows client application color formats the source code snippets in C, C++, C#, HTML, ASP, ASPX, XML,XAML, JScript, Java Script, Visual Basic, VB.Net, SQL, TSQL, PL/SQL and MSH (code name Monad) to style sheet enabled HTML code for publishing on a web site or in a blog. The tool has option to display line numbers, provide alternate line background color, and embed CSS.


Here is a sample code snippet formatted using WayFormat. I have hosted the css file at http://sameerct.googlepages.com/csharp.css and added a link tag in the head section of my blogger template pointing to this style sheet.


/// <summary>
/// Provides an option to save the CSS file.
/// </summary>
/// <param name="sender"></param>
/// <param name="e"></param>
private void lnkCSS_LinkClicked(object sender, LinkLabelLinkClickedEventArgs e)
{
try
{
FileInfo fileCSS = new FileInfo("csharp.css");

SaveFileDialog dlgCSS = new SaveFileDialog();
dlgCSS.FileName = "csharp.css";
dlgCSS.Filter = "Cascading Style Sheet|*.css";
dlgCSS.AddExtension = true;
dlgCSS.DefaultExt = "*.css";

if (dlgCSS.ShowDialog() == DialogResult.OK) fileCSS.CopyTo(dlgCSS.FileName);
}
catch (Exception ex)
{
MessageBox.Show(ex.ToString());
}
}

I have made the source code open and is hosted at CodePlex at http://www.codeplex.com/wayformat so that it is available to anyone interested to add more features or use it along with other applications. Download the executable or source code from CodePlex and use CodePlex Discussion Forum and Issue Tracker to post your comments or report any bugs you may find.

And well, there is an easier way to color format source code without using any tools. Copy paste your source code from Visual Studio to Microsoft Word and the save the word document as html web page. Now copy the content from web page (not the source) and paste directly in the blog post editor. It will look as below:

FileInfo fileCSS = new FileInfo("csharp.css");

See that the system classes like FileInfo are color coded too. :)

Friday, January 25, 2008

Windows Presentation Foundation (WPF)

WPF or Windows Presentation Foundation is an exciting presentation technology from Microsoft shipped in the .NET Framework 3.0 Version along with other technologies called Windows Communication Foundation, Windows Workflow Foundation, and Windows CardSpace.

It has been in the air since long back and I always used to wonder why some critical business application would require such a flashy jazzy user interface technology. Now that I got a chance to work in WPF, I am slowly realizing its benefits and potential.

Earlier the applications were command prompt based. Then came the GUI (Graphical User Interface) revolution that introduced the end users to windows, buttons, drop downs and so forth. But after that, there has been nothing exciting in the user interface world for desktop applications, though the web went through a fabulous UX (User Experience) change. Windows Forms that appeared with .NET was just a better version of old GUIs.

Now there is WPF with an entirely new set of features and technologies that makes it possible to define the UX of desktop application user to a new level. Of course Windows Forms will continue to be in the field, especially for LOB (Line Of Business) applications, but WPF can be used to make compelling data visualizations for applications that require a pleasing user experience.

Developing stunning applications in WPF is much easier than we might think of. In earlier technologies audio, video, etc were islands in an application. With WPF, a single API can be used for all of this. A video can be part of an application just like a button or label.
For example the below code snippet creates a Windows Vista Style Button with content as a playing video.


<Page
xmlns="http://schemas.microsoft.com/winfx/2006/xaml/presentation"
xmlns:x="http://schemas.microsoft.com/winfx/2006/xaml">
<Button Height="100" Width="200">
<Button.Content>
<MediaElement Source="C:\Users\Public\Videos\Sample Videos\Butterfly.wmv" />
</Button.Content>
</Button>
</Page>

The new XAML language helps in creating the UI layer keeping the business logic separately in the code behind files. With features like Templates, Styles, and Animations WPF is opening up a new arena where a normal developer can now create ‘cool’ apps!

Tuesday, January 15, 2008

Playing with XAML

Years back, when I saw HTML in action for the first time I was completely amazed. With just a Notepad and Browser I could do wonders! It was the same feeling I had when I saw XAML in action during the TechEd 2005 at Bangalore. One of the speakers opened up something called XAML Pad and then typed in few tags and voila… it immediately rendered the windows controls! I wanted to experiment XAML then but the heavy SDK downloads and Beta version issues kept me from it. Now my new job at IdentityMine gives me plenty chances to play with XAML.

XAML or eXtensible Application Markup Language is a new declarative programming language that can be used to define the UI elements for latest .NET technologies like WPF (Windows Presentation Foundation) and Silverlight. It helps to separate the design from code, in an ASP.NET passion where the UI can be defined in XAML and the business logic can be implemented through the attached code behind files. Designers can now use the new tool called Expression Blend to design user interfaces without writing any code and the generated XAML can be used in Visual Studio by a developer to implement its business logic.

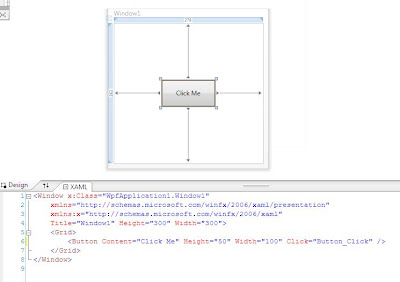
XAML is so easy to use. It’s just some tags and their attributes. Below is a screen shot from Visual Studio 2008 where XAML code is shown at the bottom and the rendering is shown at the top.


As shown in the image, a button can be defined by Button tag as below:

<Button Content="Click Me" Height="50" Width="100" Click="Button_Click"/>

And in the code behind, we can write as below:

private void Button_Click(object sender, RoutedEventArgs e)
{
MessageBox.Show("Clicked!");
}

On running this code, it produces a nice Vista style button as shown below:


Easy way to learn XAML is by playing with it. You can use Notepad to create a file with .xaml extension and make sure you include your XAML controls within the Page tags as shown below:

<Page
xmlns="http://schemas.microsoft.com/winfx/2006/xaml/presentation"
xmlns:x="http://schemas.microsoft.com/winfx/2006/xaml">
<Grid>
<Button Content="Click Me" Height="50" Width="100"/>
</Grid>
</Page>

Open this *.xaml file in Internet Explorer 7.0 or Fire Fox 2.0 or higher to see it rendered.If you don’t have Visual Studio 2008 installed, try tools like XAML Pad that comes with the SDK. It works as an independent tool even if you don’t have the SDK installed. Download it from here (it’s just 316 KB) and make sure you have .NET Framework 3.0 or higher installed.If you like to have color coding and intellisense plus few more cool features, download Kaxaml from http://www.kaxaml.com/

Of course you won’t be able to wire up code using these tools, but you can experiment a lot with XAML creating all kinds of fancy UI elements.